Prerequisites Autodiscover
If autodiscover is setup correctly, a mail client only needs e-mail address and password for configuration.
The SimplexGate Gateway will greatly simplify the neccessary configuration steps on exchange servers to achieve this.
You need activate Autodiscover for the desired domain for the desired domain in the advanced configuration .
Setup two CNAME entries in your DNS that point to the Exchange Webservice Alias.
The first required CNAME entry is "autodiscover.yourdomain.tld".
The second required CNAME entry has to be the external FQDN of your Exchange Server according to your exchange virtual directory settings.
If no virtual directories are configured yet, you can use "exchange.yourdomain.tld".
As soon as both CNAME entries are active and point to your SimplexGate Alias, a custom alias can be configured in the webservice settings.

Enter the DNS name that you have configured before (this will be checked and can only be used when the CNAME entries are active).

Now you can select if you would like to use your own server certificate or a Lets Encrypt Certificate.
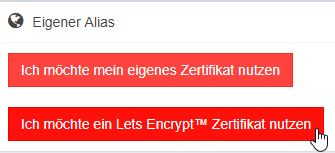
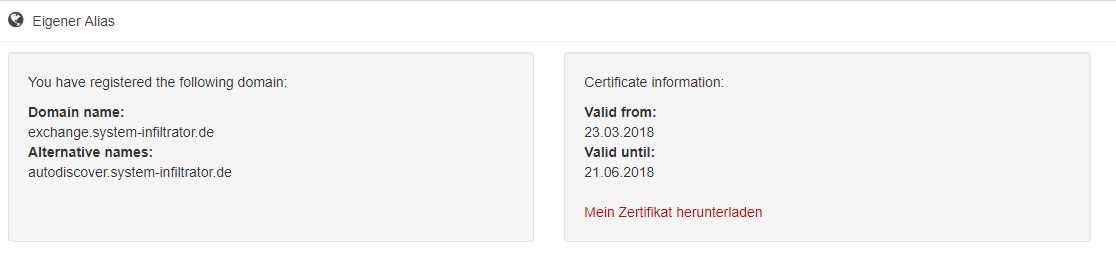
If you select the Lets Encrypt Certificate, you can download the certificate upon completion.
There are some requirements to autodiscover that have to be covered first.
The fastes way to accomplish this, is by using the Exchange Management Shell.
You can use he following commands by replacing the "hostname.yourdomain.tld" entries with your external FQDN:
Get-OwaVirtualDirectory -Server $env:computername | Set-OwaVirtualDirectory -externalurl "https://hostname.yourdomain.tld/owa"
Get-EcpVirtualDirectory -Server $env:computername| Set-EcpVirtualDirectory  -externalurl "https://hostname.yourdomain.tld/ecp"
Get-WebServicesVirtualDirectory -Server $env:computername | Set-WebServicesVirtualDirectory -externalurl "https://hostname.yourdomain.tld/EWS/Exchange.asmx" -BasicAuthentication:$true
Get-ActiveSyncVirtualDirectory -Server $env:computername | Set-ActiveSyncVirtualDirectory -externalurl "https://hostname.yourdomain.tld/Microsoft-Server-ActiveSync"
Get-OabVirtualDirectory -Server $env:computername | Set-OabVirtualDirectory  -externalurl "https://hostname.yourdomain.tld/OAB" -BasicAuthentication:$true
Get-MapiVirtualDirectory -Server $env:computername| Set-MapiVirtualDirectory -externalurl "https://hostname.yourdomain.tld/mapi" -IISAuthenticationMethods Basic,Negotiate,NTLM,OAuth
Get-OutlookAnywhere -Server $env:computername| Set-OutlookAnywhere  -ExternalHostname hostname.yourdomain.tld -ExternalClientAuthenticationMethod Basic -ExternalClientsRequireSsl $True
Get-ClientAccessService $env:computername | Set-ClientAccessService -AutoDiscoverServiceInternalUri "https://autodiscover.yourdomain.tld/autodiscover/autodiscover.xml"
After these steps, you need to restart your IIS.
There are some requirements to autodiscover that have to be covered first.
The fastes way to accomplish this, is by using the Exchange Management Shell.
You can use he following commands by replacing the "hostname.yourdomain.tld" entries with your external FQDN:
Get-OwaVirtualDirectory -Server $env:computername | Set-OwaVirtualDirectory -externalurl "https://hostname.yourdomain.tld/owa"
Get-EcpVirtualDirectory -Server $env:computername| Set-EcpVirtualDirectory  -externalurl "https://hostname.yourdomain.tld/ecp"
Get-WebServicesVirtualDirectory -Server $env:computername | Set-WebServicesVirtualDirectory -externalurl "https://hostname.yourdomain.tld/EWS/Exchange.asmx" -BasicAuthentication:$true
Get-ActiveSyncVirtualDirectory -Server $env:computername | Set-ActiveSyncVirtualDirectory -externalurl "https://hostname.yourdomain.tld/Microsoft-Server-ActiveSync"
Get-OabVirtualDirectory -Server $env:computername | Set-OabVirtualDirectory  -externalurl "https://hostname.yourdomain.tld/OAB" -BasicAuthentication:$true
Get-MapiVirtualDirectory -Server $env:computername| Set-MapiVirtualDirectory -externalurl "https://hostname.yourdomain.tld/mapi" -IISAuthenticationMethods Basic,Negotiate,NTLM,OAuth
Get-OutlookAnywhere -Server $env:computername| Set-OutlookAnywhere  -ExternalHostname hostname.yourdomain.tld -ExternalClientAuthenticationMethod Basic -ExternalClientsRequireSsl $True
Get-ClientAccessService $env:computername | Set-ClientAccessService -AutoDiscoverServiceInternalUri "https://autodiscover.yourdomain.tld/autodiscover/autodiscover.xml"
IISRESET /noforceThere are some requirements to autodiscover that have to be covered first.
The fastes way to accomplish this, is by using the Exchange Management Shell.
You can use he following commands by replacing the "hostname.yourdomain.tld" entries with your external FQDN.
Especially note the last commandlet (Set-ClientAccessServer -Identity hostname), "hostname" has to be replaced with the server name:
Get-OwaVirtualDirectory -Server $env:computername | Set-OwaVirtualDirectory -externalurl "https://hostname.yourdomain.tld/owa"
Get-EcpVirtualDirectory -Server $env:computername| Set-EcpVirtualDirectory  -externalurl "https://hostname.yourdomain.tld/ecp"
Get-WebServicesVirtualDirectory -Server $env:computername | Set-WebServicesVirtualDirectory -externalurl "https://hostname.yourdomain.tld/EWS/Exchange.asmx" -BasicAuthentication:$true
Get-ActiveSyncVirtualDirectory -Server $env:computername | Set-ActiveSyncVirtualDirectory -externalurl "https://hostname.yourdomain.tld/Microsoft-Server-ActiveSync"
Get-OabVirtualDirectory -Server $env:computername | Set-OabVirtualDirectory  -externalurl "https://hostname.yourdomain.tld/OAB" -BasicAuthentication:$true
Get-OutlookAnywhere -Server $env:computername| Set-OutlookAnywhere  -ExternalHostname hostname.yourdomain.tld -ExternalClientAuthenticationMethod Basic -ExternalClientsRequireSsl $True
Get-MapiVirtualDirectory -Server $env:computername| Set-MapiVirtualDirectory -externalurl "https://hostname.yourdomain.tld/mapi" -IISAuthenticationMethods Basic,Negotiate,NTLM,OAuth
Set-OrganizationConfig -MapiHttpEnabled $True
Set-ClientAccessServer -Identity hostname -AutodiscoverServiceInternalURI "https://hostname.yourdomain.tld/autodiscover/autodiscover.xml"
IISRESET /noforceThere are some requirements to autodiscover that have to be covered first.
The fastes way to accomplish this, is by using the Exchange Management Shell.
You can use he following commands by replacing the "hostname.yourdomain.tld" entries with your external FQDN:
Enable-OutlookAnywhere -Server $env:computername -ExternalHostname "hostname.yourdomain.tld" -DefaultAuthenticationMethod 'Basic' -SSLOffloading:$True
Get-OwaVirtualDirectory -Server $env:computername | Set-OwaVirtualDirectory -externalurl "https://hostname.yourdomain.tld/owa"
Get-EcpVirtualDirectory -Server $env:computername| Set-EcpVirtualDirectory -externalurl "https://hostname.yourdomain.tld/ecp"
Get-WebServicesVirtualDirectory -Server $env:computername | Set-WebServicesVirtualDirectory -externalurl "https://hostname.yourdomain.tld/EWS/Exchange.asmx" -BasicAuthentication:$true
Get-ActiveSyncVirtualDirectory -Server $env:computername | Set-ActiveSyncVirtualDirectory -externalurl "https://hostname.yourdomain.tld/Microsoft-Server-ActiveSync"
Get-OabVirtualDirectory -Server $env:computername | Set-OabVirtualDirectory -externalurl "https://hostname.yourdomain.tld/OAB" -BasicAuthentication:$true
Get-OutlookAnywhere -Server $env:computername| Set-OutlookAnywhere -externalhostname "hostname.yourdomain.tld" -SSLOffloading:$true -ClientAuthenticationMethod:Basic
Get-ClientAccessServer | Set-ClientAccessServer -AutodiscoverServiceInternalURI "https://hostname.yourdomain.tld/autodiscover/autodiscover.xml"
IISRESET /noforce